How to increase evenly across a row (with examples)
Photo: Yuliia Pakhomova / Unsplash
To increase evenly across a row, divide your stitches by the number of increases: that gives the size of each group. In the round you work a group, then increase, all the way around. Worked flat, you split one group in half and put the halves at the two ends, so no increase sits right at an edge. 64 stitches with 8 increases becomes [work 8, inc] × 8 in the round and work 4, inc, [work 8, inc] × 7, work 4 flat.
The method in four steps
Patterns say it in one line: "increase 8 stitches evenly across" or "inc 7 sts evenly around". The maths behind it is a division and a bit of tidying.
- Divide the stitches you have now by the number of increases. 64 ÷ 8 = 8. That is the group size: 8 stitches, then an increase.
- Check for a remainder. If the division isn't whole (50 ÷ 7 = 7, remainder 1), some groups get one stitch more. Spread those longer groups out rather than bunching them at one end.
- If you work flat, halve one group and put one half at the start of the row and the other half at the end. You still make every increase, but none of them lands on the first or last stitch, where it would get lost in a seam or an edging.
- Write the line out and add it up before you knit it. Groups plus increases must equal your new stitch count.
Lion Brand's guide to spacing increases makes the same point about the edges: start the first increase partway into the first group rather than at the very start of the row. Its advice on how exact to be is worth keeping in mind: "Focus on getting the right number of increases and relatively even spacing." A group that is one stitch longer than the others won't show; a missing increase will.
Why flat and in the round are different
A round has no beginning or end you can see. The last group runs straight into the first, so every group can be the same: work 8, increase, eight times, and the round closes neatly.
A flat piece has two edges. If you copied the round instruction, the row would finish with an increase on the very last stitch and the first group would sit against the other edge with nothing before it. Both ends would look different. Splitting one group into two halves balances the row: 4 stitches, then the increases at 8-stitch intervals, then 4 stitches. Read from either end, the row looks the same.
There is more than one sensible way to do this. Lion Brand's "increase in a row or in the round" article divides a flat row by the number of increases plus one, so the row starts and ends with a full group. Kate Atherley, writing for Modern Daily Knitting, shows several layouts, including putting the leftover at the end of the row. All of them give the right count. The half-group method is the one our free even spread calculator uses, so the numbers on this page match it exactly.
Worked example: 64 to 72 stitches
The pattern says: increase 8 stitches evenly across (or around). You have 64.
Divide: 64 ÷ 8 = 8, no remainder. Groups of 8.
In the round: [work 8, inc] × 8. Check: 8 × 8 = 64 stitches worked, plus 8 new = 72.
Flat: work 4, inc, [work 8, inc] × 7, work 4. Check: 4 + (7 × 8) + 4 = 64 stitches worked, plus 8 new = 72.
Count the increases in the flat line: one after the first 4 stitches, then seven more inside the bracket. That's 8. The half groups at each end (4 + 4) make up the eighth group of 8.
When it doesn't divide: 50 to 57 stitches
Most real stitch counts don't divide neatly. 50 stitches with 7 increases gives 50 ÷ 7 = 7.14, so the groups can't all be the same.
The pattern says: increase 7 stitches evenly. You have 50.
Divide: 50 ÷ 7 = 7, remainder 1. Six groups of 7 and one group of 8 (6 × 7 + 8 = 50).
In the round: [work 7, inc] × 3, work 8, inc, [work 7, inc] × 3. The one longer group sits in the middle of the round, not at the end.
Flat: work 4, inc, [work 7, inc] × 6, work 4. Check: 4 + (6 × 7) + 4 = 50 stitches worked, plus 7 new = 57.
Flat, the leftover stitch disappears into the two half groups at the ends: half of 7.14 is about 3.6, which rounds to 4 at each edge. In the round there are no ends to absorb it, so one group gets the extra stitch.
When the remainder is bigger, the same idea applies: the longer groups are spread through the row. 52 stitches with 6 increases, for example, works out flat as work 4, inc, [work 9, inc] × 2, work 8, inc, [work 9, inc] × 2, work 4. You don't have to work that out by hand; type your two numbers into the even spread calculator and it writes the line for you, flat or in the round.
Which increase to use, and what "work 8" means
The lines on this page assume an increase made between two stitches, such as a make one (M1) or a yarn over. The Craft Yarn Council's abbreviation list counts both M1 (make one) and kfb (knit into the front and back of a stitch) as single increases, but they are made in different places, and that changes how you count:
- M1, M1L/M1R, lifted increases, yarn overs: these sit between stitches and use none up. "Work 8, inc" means knit 8, then M1.
- kfb (knit front and back): this one is worked into a stitch, so it uses one. "Work 8, inc" becomes k7, kfb. The flat line starts "k3, kfb" instead of "work 4, inc".
- Crochet: an increase is usually two stitches in one stitch, which also uses a stitch. "Work 8, inc" becomes 1 stitch in each of the next 7, 2 stitches in the next.
If your pattern names an increase, use that one. If it just says "increase evenly", M1 is a common choice in stockinette because it leaves almost no hole; a yarn over is the choice if you want a visible eyelet.
"Work" means in pattern. If the row is ribbing or a stitch pattern, "work 8" means the next 8 stitches as they appear. Increases worked inside ribbing often get worked into the new stitch pattern on the following row, so check what your pattern says to do with them.
Quick table of common counts
Each line was produced by the same rule as the calculator. Read "work" as knit (or the stitch pattern) and "inc" as your increase.
| Stitches | Flat | In the round |
|---|---|---|
| 60 → 66 | work 5, inc, [work 10, inc] × 5, work 5 | [work 10, inc] × 6 |
| 64 → 72 | work 4, inc, [work 8, inc] × 7, work 4 | [work 8, inc] × 8 |
| 50 → 57 | work 4, inc, [work 7, inc] × 6, work 4 | [work 7, inc] × 3, work 8, inc, [work 7, inc] × 3 |
| 72 → 80 | work 5, inc, [work 9, inc] × 7, work 4 | [work 9, inc] × 8 |
| 80 → 88 | work 5, inc, [work 10, inc] × 7, work 5 | [work 10, inc] × 8 |
| 96 → 108 | work 4, inc, [work 8, inc] × 11, work 4 | [work 8, inc] × 12 |
| 100 → 110 | work 5, inc, [work 10, inc] × 9, work 5 | [work 10, inc] × 10 |
Notice 72 → 80 flat: 72 ÷ 8 = 9, and half of 9 is 4.5, so one end gets 5 and the other 4. That's fine; nobody will see one stitch of difference at an edge.
Keep track of the row
An increase row with a remainder is easy to lose your place in, especially if you put it down halfway. A few habits help:
- Place a stitch marker after each group before you start, or after each increase as you make it. If the row ends with the wrong count, you can check one section at a time.
- Write the whole line where you'll see it, brackets and all, on the row it belongs to.
- Count the stitches after the row and compare with the new total the pattern gives.
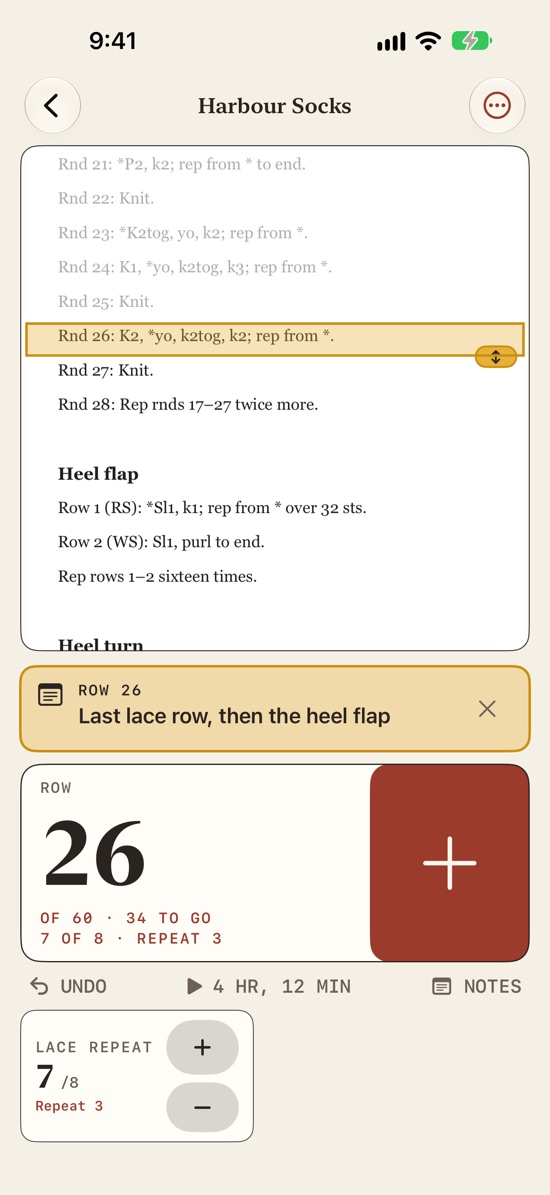
In Ballband you can pin that line to its row as a row note: it shows up when your row counter reaches that row, so the increase row can't slip past while you're following the rest of the pattern.
Questions
What does "increase evenly across" mean?
It means add the given number of stitches spread as evenly as you can over the whole row, rather than all in one place. The pattern leaves the exact spacing to you; dividing your stitch count by the number of increases gives it.
Does it matter if my groups are a stitch off?
Very rarely. A group of 9 next to groups of 8 won't show, especially at a change from ribbing to stockinette. What matters is the total: make every increase and end with the stitch count the pattern asks for.
Can I increase on a wrong-side row?
Yes, if the pattern places the increase row there. Use the purl version of your increase (for example M1P, make one purlwise) so the new stitches sit the same way as the others.
How do I increase evenly in crochet?
The spacing is worked out the same way. The difference is that a crochet increase is usually two stitches in one stitch, so each group of 8 becomes 7 single stitches and one increase stitch.
For the opposite job, see how to decrease evenly across a row: the method is the same, except each decrease uses two stitches.
- Lion Brand Notebook: How to Evenly Space Your Increases/Decreases (Laura Yona), checked 22 Nov 2026.
- Lion Brand Notebook: How to Increase in a Row or in the Round (Barbara Breiter), checked 22 Nov 2026.
- Modern Daily Knitting: Techniques in Depth: Less Evenly Across? (Kate Atherley), checked 22 Nov 2026.
- Craft Yarn Council: Knitting Abbreviations Master List (M1, kfb, inc), checked 22 Nov 2026.