How to keep your place in a knitting or crochet pattern
Photo: la crafter / Unsplash
Keep two things, not one: the row number, and a mark on the line of the pattern you're working. Move both the moment you finish a row, before you put the work down. Most lost places come from a counter that says "Row 24" while your eyes are on Row 23.
Why you lose your place
Keeping your place in a pattern is really three questions at once:
- Which row am I on? A number: Row 24, Round 7.
- Where is that row on the page? The line you need to read, which is not always the line under the last one. Patterns wrap long rows onto two lines, group rows ("Rows 21–28: work in pattern"), put a heading or a note between them, or carry on in a second column.
- Where am I in the repeat? "Repeat Rows 17–27 twice more" needs a second number: which pass through those rows you're on.
Most methods answer one of these well and leave the others to memory. That works until the phone rings in the middle of a row, or the project waits in a bag for two weeks.
Sticky notes, highlighter tape and a pencil
Paper methods are cheap and they work, as long as you move them every row.
- A sticky note or a strip of highlighter tape on the line you're working. For written instructions put it under the current row and slide it down when you finish; that is the method Berroco shows in its knit-along on keeping track of rows. Highlighter tape is repositionable and lets you read the line through it.
- A clear sheet protector over a printout keeps tape from tearing the paper and lets you reuse the tape for weeks.
- A magnetic board with a magnetic strip holds the page and the marker together, so neither slides off in your bag.
- Pencil tally marks in the margin: one stroke per row. They give you a record you can check later, which a moving marker doesn't.
- "NEXT ROW: 25" with a date written on the pattern when you put a project away. One of the readers' tips on that same Berroco post, and the best answer to "where was I?" after a long break.
Which side of the row you cover depends on the direction you read. Written instructions go down the page, so the rows you haven't reached are below you. Charts are read from the bottom up, so the unworked rows are above; Jimmy Beans Wool's chart tutorial shows the tape placed above the row being worked, with the eyes on the row below it. Either way the rule is the same: cover what's ahead, leave what you've done in view so you can compare it with your fabric.
| Method | Shows the line | Keeps the number | Weak spot |
|---|---|---|---|
| Sticky note, highlighter tape | Yes | No | Easy to forget to move; falls off |
| Magnetic board and strip | Yes | No | Paper only; bulky |
| Pencil tally marks | No | Yes, with a record | Messy over long repeats |
| Row counter (clicker, barrel, app) | No | Yes | Doesn't tell you where the row is |
| Line on the pattern tied to the counter | Yes | Yes | The pattern has to be a file or a photo |
Is a row counter enough?
A counter is the most reliable way to hold the number: a barrel counter on the needle, a clicker, or a counter on your phone. It is not, on its own, a way to keep your place in the pattern. "Row 24" doesn't show you which line is Row 24 when the pattern says "Rows 21–28", when Row 23 wraps onto two lines, or when Row 24 sits at the top of the next column.
Two habits make any counter more trustworthy:
- Count when the row is finished, not when you start it. Then the number always means "rows done", and an interrupted row is easy to spot: the stitches on your needle are half one pattern, half the other.
- Decide what 0 means. Is the cast-on row Row 0 or Row 1? Patterns differ. Settle it before Row 1 and write it on the pattern.
A line on the pattern that moves with the count
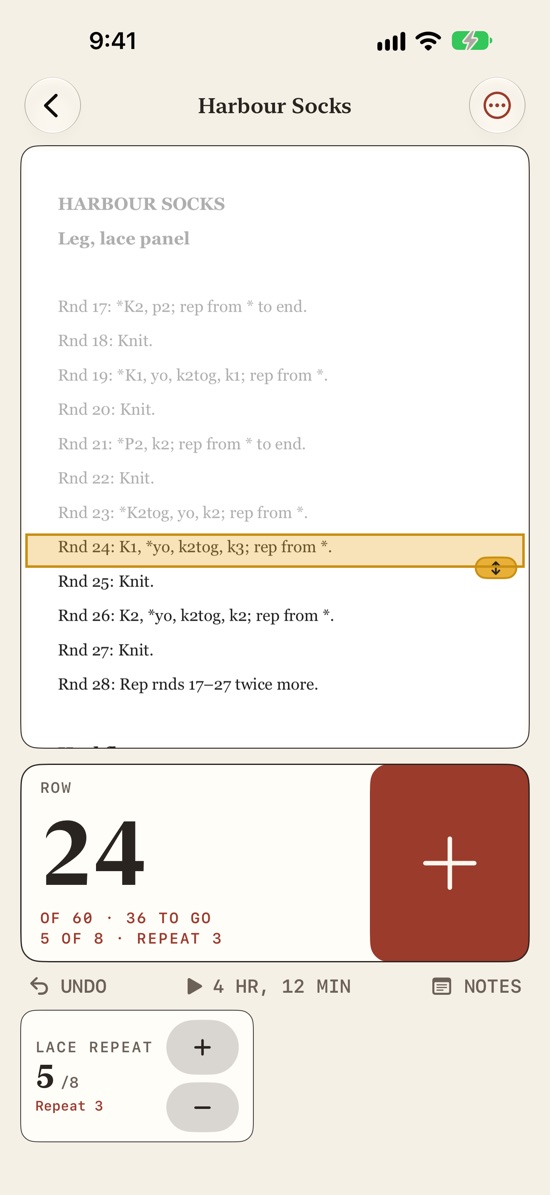
The fix for "the counter says 24 but where is it?" is to tie the marker to the number, so the line moves when you count. On a printout that's you, moving the tape every time you click. On a PDF you can highlight each row in a PDF reader, but then you're re-highlighting by hand on every row.
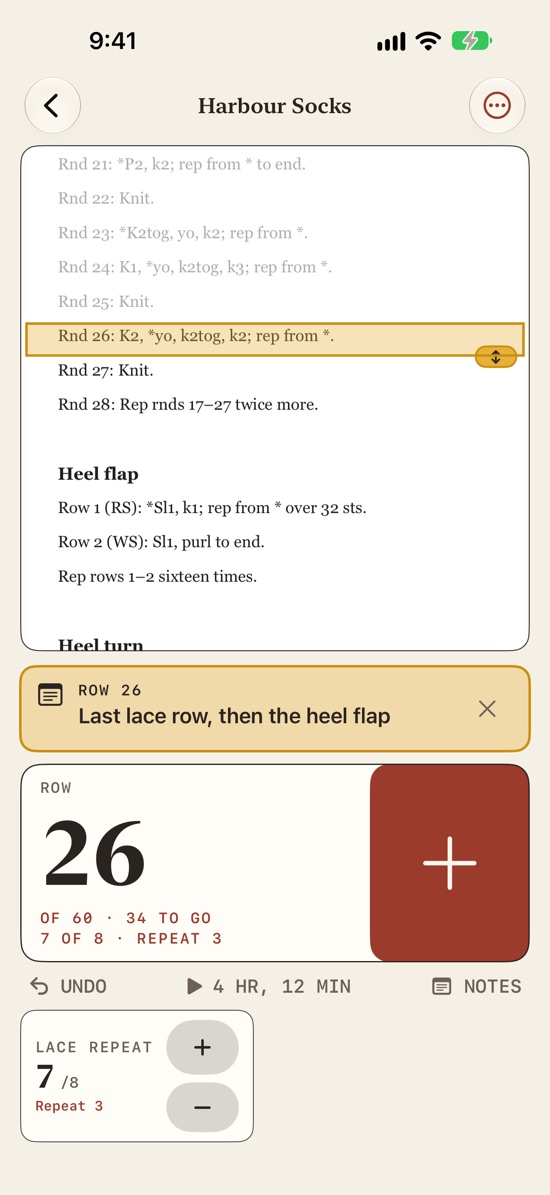
This is the one job we built Ballband around: a saffron line sits on your PDF or photographed pattern and moves to the next row each time you tap +. It reads the pattern's own "Row N" and "Rnd N" labels, so it covers a row that wraps onto two lines and skips the heading in between. If you'd rather try the idea in a browser first, our free pattern follower opens a PDF or a pasted pattern and does the same.
Two-column PDFs and multi-page patterns
Many pattern PDFs set the instructions in two columns to fit more on a page. The trap is at the bottom of the left column: your eye drops to the next line, which might be a schematic, a size table or the next page, when the next row is actually at the top of the right column.
- Draw the jump. On a printout, a pencil arrow from the last row of the left column to the first row of the right one takes five seconds and saves a lot of frogging.
- Write the row range on each page, for example "p. 2: Rows 17–34". When you pick the project up again you go straight to the right page.
- Keep the chart and the written page together. If the pattern gives a chart on page 4 and the instructions that refer to it on page 2, print both and keep them side by side.
- Mark your size. Numbers in parentheses, such as "cast on 88 (96, 104) sts", are sizes, not columns of rows. Circle your size throughout before you start; a highlighter works well here because you never need to move it.
- On a phone, zoom to one column. Reading a two-column page at full width means tiny text; reading one column at a time means scrolling sideways at the end of it. Either way, check where the next row really is before you start it.
Repeats and "at the same time"
A repeat adds a second number to keep. "Rows 17–24 form the lace pattern; repeat them 4 times" means you need the row within the repeat (1 to 8) and the repeat you're on (1 to 4). Keep them apart: one counter for the rows of the whole piece, a second one that counts 1 to 8 and starts over. Tally marks work too, one column per repeat.
"At the same time" instructions are the classic place to lose track: you keep working the pattern rows while also, say, decreasing every 6th row for the neckline. Write the shaping rows out as a list before you start (Row 6, 12, 18 …) and tick them off, or set a note on those rows so it shows up when you get there.
A routine that holds up
- Before Row 1: circle your size, set the counter to 0, put the marker on Row 1, and note whether Row 1 is a right-side or wrong-side row.
- At the end of every row: count, then move the marker. Same moment, same order, every time.
- Mid-row interruptions: finish the row if you can. If you can't, leave the counter alone; a row isn't done until it's done.
- Putting it away: write the next row and the date on the pattern.
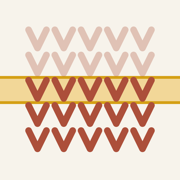
- Every so often: check the fabric against the count. Each V in a column of stockinette is one row; each ridge in garter stitch is two. If the fabric and the counter disagree, trust the fabric and fix the counter.
Questions
How do I mark my place on a PDF knitting pattern?
Either print it and use highlighter tape or a sticky note that you move every row, or use an app that puts a marker on the PDF and moves it with your row counter, so the line and the number can't drift apart.
Should the sticky note go above or below the row?
Cover the rows you haven't reached. For written instructions that is below the current row; for a chart, which you read from the bottom up, it is above.
How do I keep track of rows in crochet?
The same way: a counter for the number and a marker on the pattern for the line. Crochet rows are easy to count in the fabric too, so a stitch marker in the last stitch of every tenth row makes recounting quick.
I lost my place anyway. How do I find it?
Count rows in the fabric from something you know, like the cast-on or the last marked row, then find that row in the pattern. Compare the last row on your needle with the pattern rows around it; lace and texture usually make it obvious.
- Berroco: Happy Harvest Knit-along, Keeping Track of Your Rows (sticky note under the current row; readers' tips such as a dated "next row" note and magnetic boards), checked 22 Nov 2026.
- Jimmy Beans Wool: Keep Track of Your Place in Chart Reading (highlighter tape above the working row, sheet protector), checked 22 Nov 2026.
- Craft Yarn Council: Knitting Abbreviations Master List (rep, rnd, RS, WS), checked 22 Nov 2026.
- Brooklyn Tweed: Reading Charts (charts are read from the bottom up), checked 22 Nov 2026.